一、简介
从Android 5.0开始,谷歌公司推出了一个用于大量数据展示的新控件RecylerView,可以用来代替传统的ListView,更加强大和灵活,是support-v7包中的新组件。
基本使用
|
在使用RecyclerView时候,必须指定一个适配器Adapter和一个布局管理器LayoutManager。并使用继承RecyclerView.Adapter的适配器。
布局资源
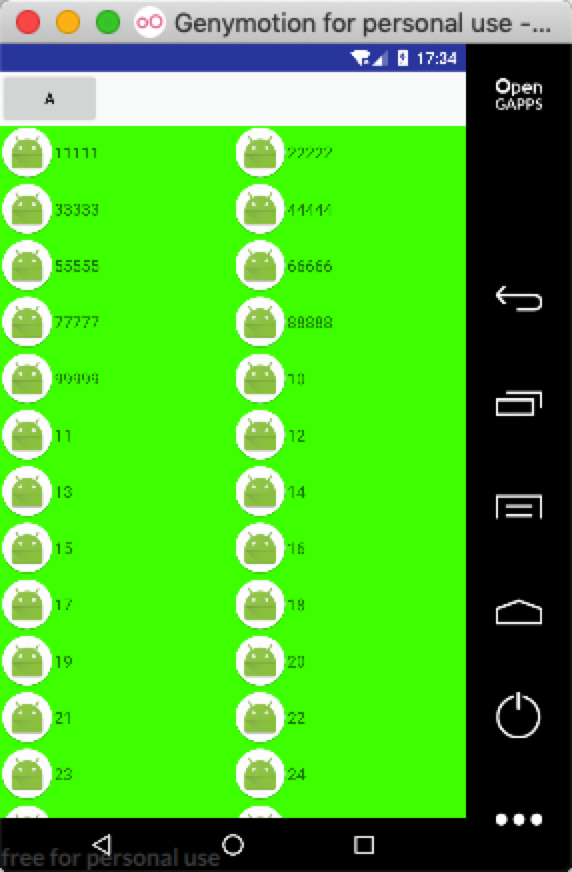
在activity_main.xml中添加RecycleView...
<android.support.v7.widget.RecyclerView
android:id="@+id/recyclerview"
android:layout_width="match_parent"
android:layout_height="match_parent">
</android.support.v7.widget.RecyclerView>
...
在res/layout文件夹下添加layout_item.xml布局文件<LinearLayout xmlns:android="http://schemas.android.com/apk/res/android"
android:orientation="horizontal" android:layout_width="match_parent"
android:layout_height="50dp"
android:background="#00ff00">
<ImageView
android:layout_width="wrap_content"
android:layout_height="wrap_content"
android:src="@mipmap/ic_launcher_round"
android:layout_gravity="center"/>
<TextView
android:id="@+id/a"
android:layout_width="wrap_content"
android:layout_height="wrap_content"
android:text="aaaaaaaa"
android:layout_gravity="center"/>
</LinearLayout>
创建适配器
必须创建一个继承RecyclerView.Adapter
的自定义适配器。
其中VH必须继承RecyclerView.ViewHolder类class MyAdapter(datas: Array<String>, context: Context) : RecyclerView.Adapter<Myholder>() {
...重写Adapter中的三个函数:
onCreateViewHolder():创建ViewHolder。onBindViewHolder():将数据渲染至指定item中,被渲染的参数为我们创建或重用的ViewHodler。getItemCount():总共的item个数。
|
创建ViewHolder
继承ViewHodler后,需要在里面找到我们需要的item中的View控件。class Myholder(itemView: View?) : RecyclerView.ViewHolder(itemView) {
var text: TextView? = null
init {
text = itemView!!.findViewById(R.id.a)
}
}
注意:由于在多次滚动中会复用ViewHodler对象,因此在重复使用时,推荐reset的功能来重置UI数据。否则会出现UI混乱的现象。
添加布局管理器LayoutManager
这里使用LinearLayoutManager布局管理器。layoutManager = LinearLayoutManager(this)
// 设置布局方式
recyclerview.layoutManager = layoutManager
添加至RecycleView
最后将上述对象添加至RecycleView对象即可。
二、四大组成部分
四大组成部分是:
- Adapter:Item数据提供即展示
- LayoutManager:Item布局及缓存
- ItemAnimator:Item动画
- ItemDecoration:Item直接的间距管理
上述简单实例可以看到LayoutManager和Adapter为必须提供的数据,而ItemDecoration和ItemAnimator为非必要数据。
布局管理器 LayoutManager
显示水平、垂直、瀑布等样式的时候便是根据LayoutManager来进行控制的。他决定了我们的RecycleView的显示效果,并且完成了itemView的回收和复用的功能
系统提供了三种布局管理器:
- LinearLayoutManager:水平或垂直管理。
- GridLayoutManager:网格管理。
- StaggeredGridLayoutManager:瀑布流管理。
当然,还可以自定义实现LayoutManager类来完成自定义管理列表。
常用函数
| 函数名称 | 功能 |
|---|---|
| canScrollHorizontally() | 能否横向滚动 |
| canScrollVertically() | 能否纵向滚动 |
| scrollToPosition(int position) | 滚动到指定位置 |
| findViewByPosition(int position) | 获取指定位置的Item View |
| findFirstCompletelyVisibleItemPosition() | 获取第一个完全可见的Item位置 |
| findFirstVisibleItemPosition() | 获取第一个可见Item的位置 |
| findLastCompletelyVisibleItemPosition() | 获取最后一个完全可见的Item位置 |
| findLastVisibleItemPosition() | 获取最后一个可见Item的位置 |
| setOrientation(int orientation) | 设置LinearLayoutManager滚动的方向 |
| getOrientation() | 获取滚动方向 |
| getDecoratedLeft() | 获取子视图的 left 边缘 |
| getDecoratedTop() | 获取子视图的 top 边缘 |
| getDecoratedRight() | 获取子视图的 right 边缘 |
| getDecoratedBottom() | 获取子视图的 bottom 边缘 |
| measureChild() measureChildWithMargins() | 测量 Recycler 的新视图 |
| layoutDecorated() | 布局 Recycler 的新视图 |
| getDecoratedMeasuredWidth() 或 getDecoratedMeasuredHeight() | 获取 子视图的测量数据 |
自定义LayoutManager
继承RecycleView.LayoutManager
继承该类来完成相关功能class MyLayoutManager(displayMetrics: DisplayMetrics?) : RecyclerView.LayoutManager() {
...
generateDefaultLayoutParams()(真正需要重写的函数)
这个方法就是RecyclerView Item的布局参数,换种说法,就是RecyclerView 子 item 的 LayoutParameters,若是想修改子Item的布局参数(比如:宽/高/margin/padding等等),那么可以在该方法内进行设置。override fun generateDefaultLayoutParams(): RecyclerView.LayoutParams {
return RecyclerView.LayoutParams(RecyclerView.LayoutParams.WRAP_CONTENT, RecyclerView.LayoutParams.WRAP_CONTENT)
}
onLayoutChildren
是LayoutManager 的主入口,在初始化布局或者数据集的大小改变时调用一次,类似于ViewGroup的onLayout函数,完成了查找子控件、测量子控件、放置子控件的子控件布局功能。
在放置过程中并不会影响ItemDecoration的大小。override fun onLayoutChildren(recycler: RecyclerView.Recycler?, state: RecyclerView.State?) {
super.onLayoutChildren(recycler, state)
var offsetY = 0
for (i in 0..(itemCount - 1)) {
val scrap = recycler!!.getViewForPosition(i)
addView(scrap)
// 测量子视图时将margin和padding添加进去
measureChildWithMargins(scrap, 0, 0)
// 测量控件大小
val perItemWidth = getDecoratedMeasuredWidth(scrap)
val perItemHeight = getDecoratedMeasuredHeight(scrap)
// 放置控件即其位置
layoutDecorated(scrap, 0, offsetY, perItemWidth, offsetY + perItemHeight)
offsetY += perItemHeight
}
TotalHeight = offsetY
}
getViewForPosition根据position获取View对象addView添加至View中measureChildWithMargins测量子View,包括margin和paddinggetDecoratedMeasuredWidth测量控件宽高layoutDecorated设置控件放置的位置
也可以根据上面函数,修改代码完成以下功能: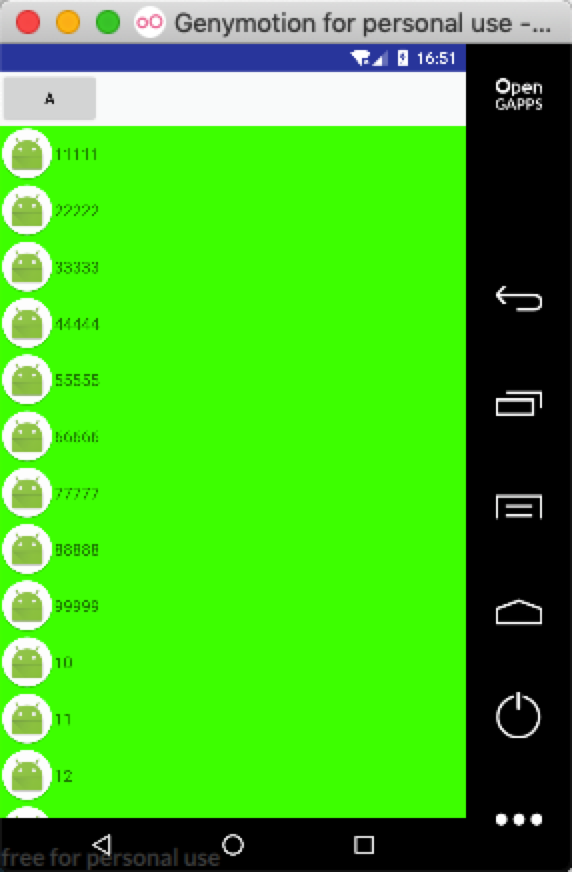
|
注意:这里需要注意
notifyDataSetChanged
当使用 notifyDataSetChanged()触发 RecyclerView.Adapter 的更新操作时, LayoutManager 负责更新布局中的视图。这时,onLayoutChildren()会被再次调用。@Override
public void onLayoutChildren(RecyclerView.Recycler recycler, RecyclerView.State state) {
// 判断是否存在view
if (getItemCount() <= 0 || state.isPreLayout()) {
return;
}
super.onLayoutChildren(recycler, state);
// 断开连接
detachAndScrapAttachedViews(recycler);
// 在notifyDataSetChanged时会调用至此
if (itemState.size() != 0) {
recycleAndFillView(recycler, state);
return;
}
// 计算并保存每个ItemView
calculateChildrenSite(recycler);
recycleAndFillView(recycler, state);
}notifyItemXXXXX
在改变数据集的同时会触发onLayoutChildren()来重新绘制它的子视图,但是数据集的改变默认只能触发onLayoutChildren()一次,你还需要重写supportsPredictiveItemAnimations ()方法,来实现触发onLayoutChildren()执行二次。@Override
public boolean supportsPredictiveItemAnimations() {
return true;
}
重写这个方法后,onLayoutChildren()会在你每次对数据集更改后调用两次, 一次是”预布局”(pre-layout)阶段,一次是真实布局(real layout)。
预布局:这个阶段主要为布局设置动画的初始状态。
真实布局:这个阶段就是为布局设置最终的真实状态。
Predictive Item Animations 这个特性允许我们给 view (基于数据改变产生)的过渡动画 提供更多有用的信息。
RecyclerView.State.isPreLayout ()这个方法可以检查我们是在哪个布局阶段
onAdapterChanged
设置新的 adapter 会触发这个事件,移除视图会触发一个新的布局过程,当 onLayoutChildren() 被再次调用时, 我们的代码会需要初始化整个过程。@Override
public void onAdapterChanged(RecyclerView.Adapter oldAdapter, RecyclerView.Adapter newAdapter) {
removeAllViews();
}scrollToPosition
设置的Item应在View的顶部@Override
public void scrollToPosition(int position) {
if (position < 0 || position >= getItemCount()) {
return;
}
Rect rect = allItemRects.get(allItemRects.indexOfKey(position));
verticalScrollOffset = rect.top;
requestLayout();
}smoothScrollToPosition
canScrollVertically() & canScrollHorizontally()
用于返回true或false来使其具有垂直滑动或水平滑动能力。
scrollVerticallyBy & scrollHorizontallBy
用于处理垂直滑动和水平滑动的功能。override fun scrollVerticallyBy(dy: Int, recycler: RecyclerView.Recycler?, state: RecyclerView.State?): Int {
val dy = -dy
val topView = getChildAt(0)
val bottomView = getChildAt(childCount - 1)
val top = getDecoratedTop(topView)
val bottom = getDecoratedBottom(bottomView)
if (top + dy > 0 || bottom + dy < height) {
return 0
}
// 设置滑动
offsetChildrenVertical(dy)
return dy
}
这是一个简单的实现效果:
- 1.获取TopView和BottomView对象,并获取它们与View边缘的距离
- 2.判断是否达到滑动边缘,控制其停止滑动
- 3.设置滑动并return
其中offsetChildrenVertical() 和 offsetChildrenHorizontal() 这两个方法 可以帮助我们处理匀速移动。 如果你不实现它,你的视图就不会滚动。
缓存(复用与回收)
首先需要了解RecyclerView的缓存机制。
- detachAndScrapView
当需要对View进行重新排序而非修改数据,会将ViewHolder放置scrap缓存中 - removeAndRecycleView
不在屏幕显示,会将ViewHolder放置recycle缓存中
我们的工作就是需要在控件滑动的时候找到此时显示在界面的View和刚刚滑出界面的View,并对他们进行复用和回收。
创建ViewHolder的位置和标记
|
测量并初始化缓存
完成了将View添加至可见范围,并记录所以的View的显示范围和初始化为不可见private void calculateChildrenSite(RecyclerView.Recycler recycler) {
int width = 0, height = 0;
boolean flag = true;
// 循环内部view
for (int i = 0; i < getItemCount(); i++) {
if (flag) {
View view = recycler.getViewForPosition(i);
measureChildWithMargins(view, 0, 0);
calculateItemDecorationsForChild(view, new Rect());
width = getDecoratedMeasuredWidth(view);
height = getDecoratedMeasuredHeight(view);
addView(view);
}
// 计算高度是否超过显示高度,超过则不再添加View至显示区域
if (totalHeight > getHeight() + height) {
flag = false;
}
// 查找缓存中是否有对应位置
Rect mRect = allItemRects.get(i);
if (mRect == null) {
mRect = new Rect();
}
// 缓存view的位置
mRect.set(0, totalHeight, width, totalHeight+height);
totalHeight += height;
allItemRects.put(i, mRect);
// 初始化为不可见
itemState.put(i, false);
}
}
根据滑动距离,重新释放滑出的view的缓存和添加新的View控件
测量当前显示范围中的View,并将他们区分是添加还是缓存private void recycleAndFillView(RecyclerView.Recycler recycler, RecyclerView.State state) {
if (getItemCount() <= 0 || state.isPreLayout()) {
return;
}
// 屏幕显示范围
Rect rect = new Rect(0, verticalScrollOffset, getHorizontalSpace(), verticalScrollOffset + getVerticalSpace());
/**
* 将滑出屏幕的Items回收到Recycle缓存中
*/
for (int i = 0; i < getItemCount(); i++) {
View child = recycler.getViewForPosition(i);
Rect childRect = allItemRects.get(i);
// 判断是否还在显示区域
if (!Rect.intersects(rect, childRect)) {
// 不在显示区域
removeAndRecycleView(child, recycler);
itemState.put(i, false);
} else {
measureChildWithMargins(child, 0, 0);
addView(child);
layoutDecorated(child, childRect.left, childRect.top - verticalScrollOffset, childRect.right, childRect.bottom - verticalScrollOffset);
itemState.put(i, true);
}
}
}
添加至LayoutManager中
|
以上就是一个基础的LayoutManager的自定义代码。
Item Decoration间隔样式
RecyclerView通过addItemDecoration()方法添加item之间的分割线。而间隔样式需要我们自己实现完成。这里更加自定义了我们需求不止于Item间隙,更适用于Item的margin和整个View的Margin范围。
需要继承RecycleView.ItemDecoration类,并在内部有三个可实现的方法:
- onDraw(c: Canvas?, parent: RecyclerView?, state: RecyclerView.State?):在Item绘制之前被调用,该方法主要用于绘制间隔样式。
- onDrawOver(c: Canvas?, parent: RecyclerView?, state: RecyclerView.State?):在Item绘制之前被调用,该方法主要用于绘制间隔样式。
- getItemOffsets(outRect: Rect?, view: View?, parent: RecyclerView?, state: RecyclerView.State?):设置item的偏移量,偏移的部分用于填充间隔样式,即设置分割线的宽、高;在RecyclerView的onMesure()中会调用该方法。
官方可以看到DividerItemDecoration类实例:public DividerItemDecoration(Context context, int orientation) {
final TypedArray a = context.obtainStyledAttributes([android.R.attr.listDivider]);
mDivider = a.getDrawable(0);
a.recycle();
setOrientation(orientation);
}
看到其用了android.r.attr.listDivider资源来添加我们指定的资源文件style。那么在style中就可以用该格式添加我们自定义的显示图样。
1.创建自定义的样式。
2.添加至style中的listDivider。
3.在自定义中ItemDecoration中引用。
如:
1.创建自定义样式<?xml version="1.0" encoding="utf-8"?>
<shape xmlns:android="http://schemas.android.com/apk/res/android"
android:shape="rectangle" >
<gradient
android:endColor="#00ffff"
android:startColor="#ffff00"
android:type="linear" />
<size android:height="4dp"
android:width="4dp"/>
</shape>
2.将自定义样式添加至style.xml文件中<style name="AppTheme" parent="Theme.AppCompat.Light.DarkActionBar">
<item name="android:listDivider">@drawable/shape_test</item>
</style>
3.在自定义的ItemDecoration中引用class MyItemDecoration(context: Context) : RecyclerView.ItemDecoration() {
var drawable: Drawable? = null
init {
val attrs = intArrayOf(android.R.attr.listDivider)
val typeArray = context.obtainStyledAttributes(attrs)
drawable = typeArray.getDrawable(0)
typeArray.recycle()
}
override fun onDraw(c: Canvas?, parent: RecyclerView?, state: RecyclerView.State?) {
super.onDraw(c, parent, state)
for (i in 0..(parent!!.childCount - 1)) {
drawable!!.setBounds(view.left - 100, view.top, view.right, view.bottom + 100)
drawable!!.draw(c)
}
}
override fun onDrawOver(c: Canvas?, parent: RecyclerView?, state: RecyclerView.State?) {
super.onDrawOver(c, parent, state)
}
override fun getItemOffsets(outRect: Rect?, view: View?, parent: RecyclerView?, state: RecyclerView.State?) {
super.getItemOffsets(outRect, view, parent, state)
outRect!!.set(100, 0, 0, 100)
}
}
这里分别流出了item的左和下两个部分,并绘制自定义的shape(注释中的显示与未注释效果一致)。需要注意流出空间位置,和画的位置即可。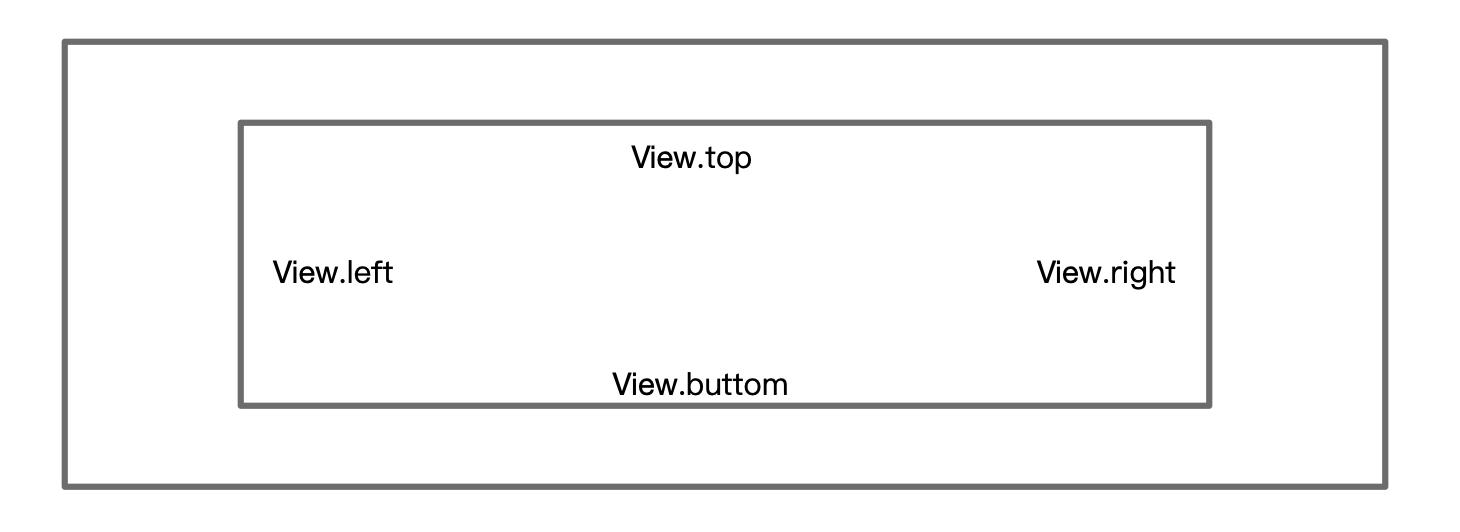
getItemOffsets
该函数的类似给每个Item设置margin参数。如下图: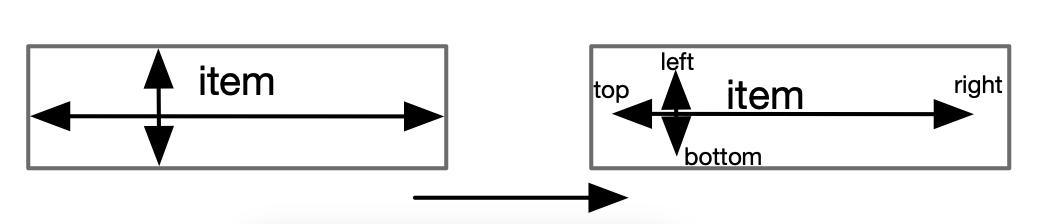
onDraw
看名称就知道是用于在指定canvas上绘制的函数
onDrawOver
相对于上述onDraw,该方法用于整个View,不受Item限制。